vector |
| The most popular template from the STL is the vector. It is very similar to C++ array. However, the size of an STL array can be changed very easily. The code below shows how to declare a used a STL vector. La plantilla más popular de la STL es el vector. Este es muy similar a un arreglo en C++. Sin embargo, el tamaño de un arreglo de arreglo en la STL puede ser modificado muy fácilmente. El código de abajo muestra como declarar y usar un vector de la STL. |
| Program.cpp |
| vector<double> weight; weight.resize(4); weight[0] = 100.0; weight[1] = 101.0; weight[2] = 102.0; weight[3] = 103.0; |
| Tip |
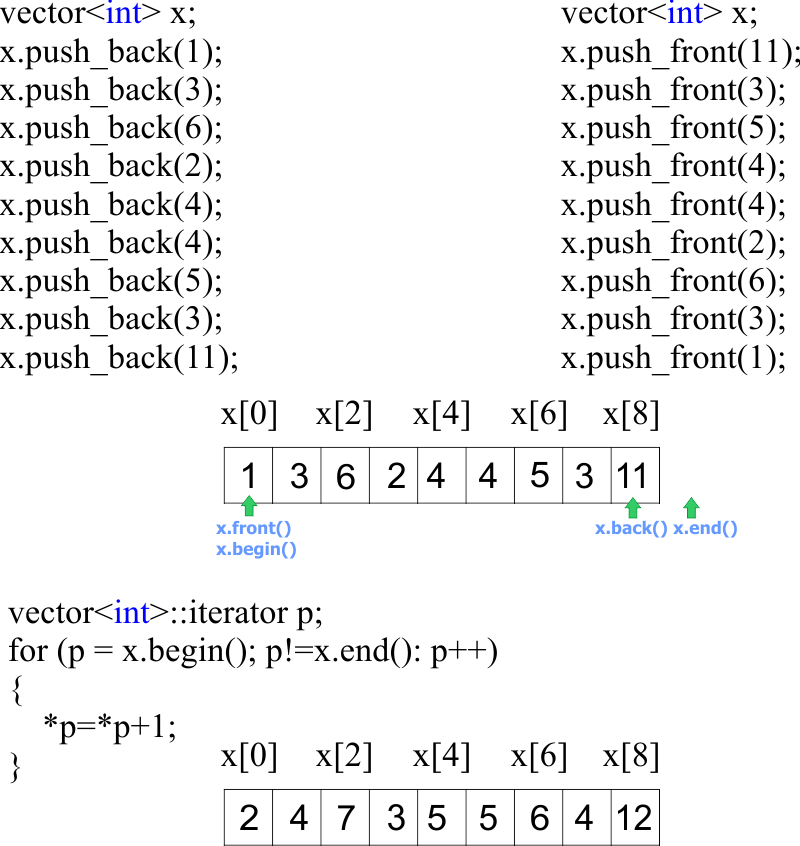
| The code below illustrates how to insert elements at the end of the array. The figure illustrates how to use push_front, push_back and how to iterate the elements of a vector. El código de abajo ilustra cómo insertar elemento al final del arreglo. La figura ilustra cómo usar push_front, push_back y cómo iterar el contenido de un vector. |
| Program.cpp |
| vector<double> weight; weight.push_back(100.0); weight.push_back(101.0); weight.push_back(102.0); weight.push_back(103.0); |
| Tip |
| The code below illustrates how to delete (erase) the second element of an array (with an index of one). El código de abajo ilustra cómo eliminar (borrar) el segundo elemento de un arreglo (con un índice de uno) |
| Program.cpp |
| vector<double> weight; weight.push_back(100.0); weight.push_back(101.0); weight.push_back(102.0); weight.push_back(103.0); // weight.erase(weight.begin()+1); // It deletes 101.0 |
| Tip |
| The following code illustrates how to find the elements that are different between two vectors. El código siguiente ilustra cómo encontrar los elementos que son diferentes entres dos vectores. |
| Program.cpp |
| vector<int> v1 {1, 2, 5, 5, 5, 9}; vector<int> v2 {2, 5, 7}; vector<int> diff; std::sort(v1.begin(), b1.end()); std::sort(v2.begin(), b2.end()); std::set_difference(v1.begin(), v1.end(), v2.begin(), v2.end(), std::inserter(diff, diff.begin())); |
| Program.cpp |
| vector<int> v1 {1, 2, 5, 5, 5, 9}; vector<int> v2 {2, 5, 7}; vector<int> diff; std::sort(v1.begin(), b1.end()); std::sort(v2.begin(), b2.end()); std::set_difference(v1.begin(), v1.end(), v2.begin(), v2.end(), std::inserter(diff, diff.begin())); |
| Problem 1 |
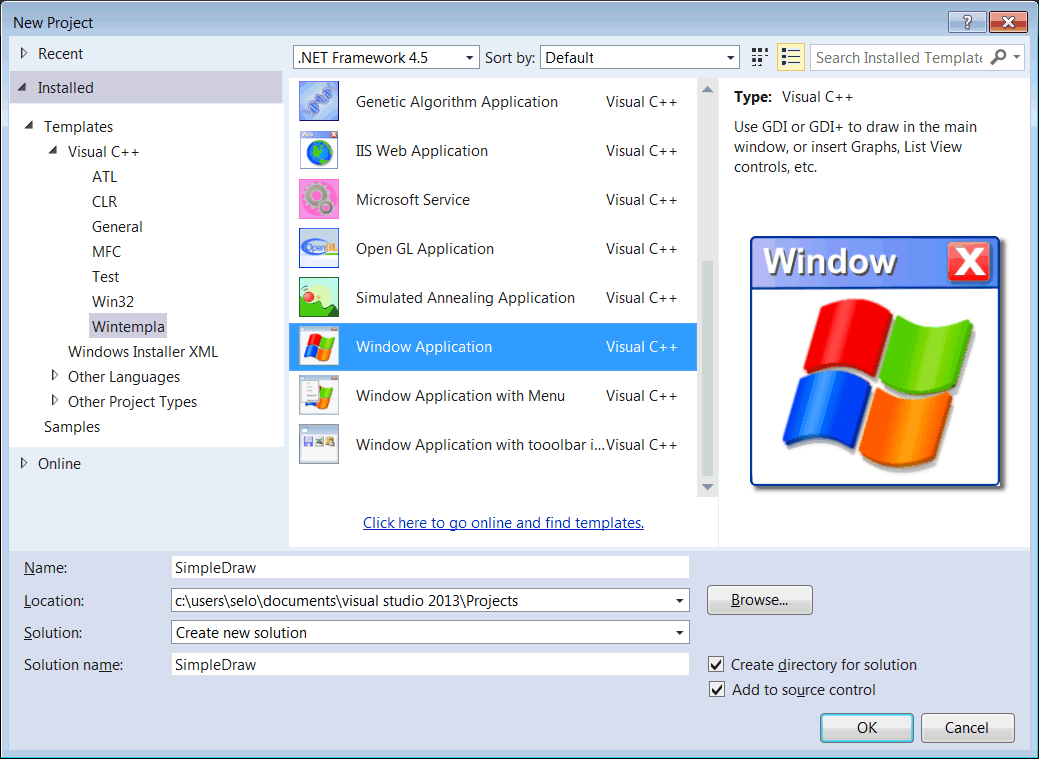
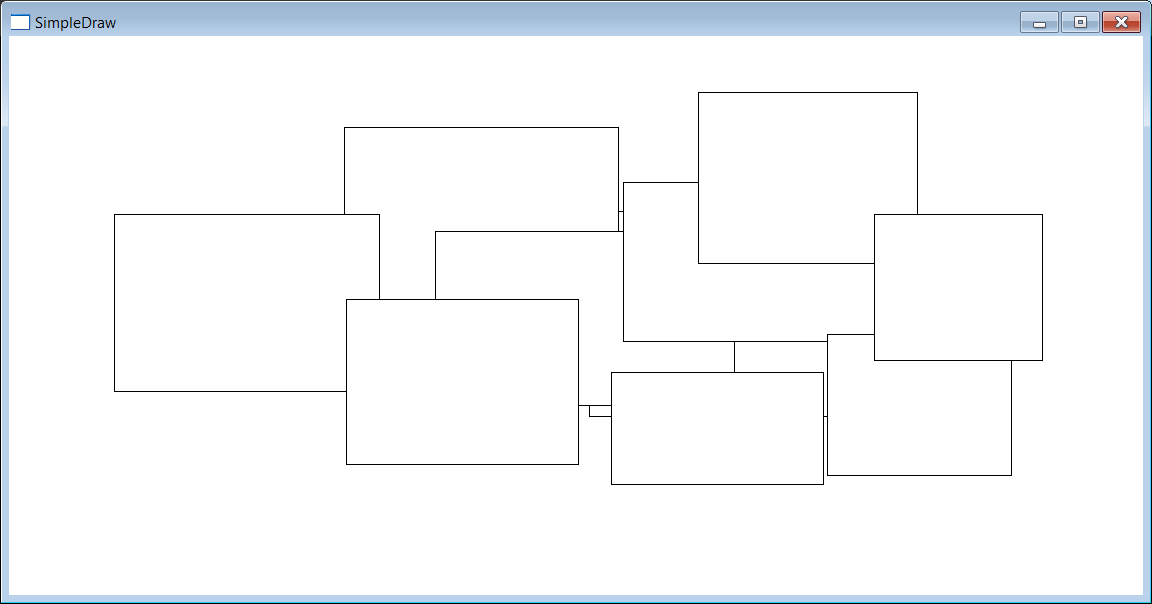
| Create a Wintempla Windows application called SimpleDraw to llustrate how to use a STL vector. SimpleDraw is a simple graphics program that draws rectangles using the mouse. First, the user clicks in the window to indicate one corner of the rectangle. Second, the user moves the mouse while holding the button of the mouse pressed. Finally, the user releases the mouse button to indicate the other corner of the rectangle. Users can type Ctrl-C to copy the image to the clipboard. When the program closes, the data of the vector is stored in a file in a hard drive. When the program opens again, it loads the previous drawing. Do NOT forget to select Window Application when creating the application. Cree una aplicación de Ventana de Wintempla llamada SimpleDraw para ilustrar como usar un vector de la STL. SimpleDraw es un programa de Gráficos simple que dibuja rectángulos con el ratón. Primero, el usuario hace clic en la ventana para indicar uno de las esquinas del rectángulo. Segundo, el usuario mueve el ratón mientras mantiene apretado el botón del ratón. Finalmente, el usuario libera el botón del ratón para indicar la otra esquina del rectángulo. Los usuarios pueden teclear Ctrl-C para copiar la imagen al porta papeles. Cuando el programa termina, los datos del vector se almacenan en un archivo en el disco duro. Cuando el programa se abre otra vez, este carga el dibujo previo. No olvide de seleccionar Window Application cuando cree la aplicación. |
| Step A |
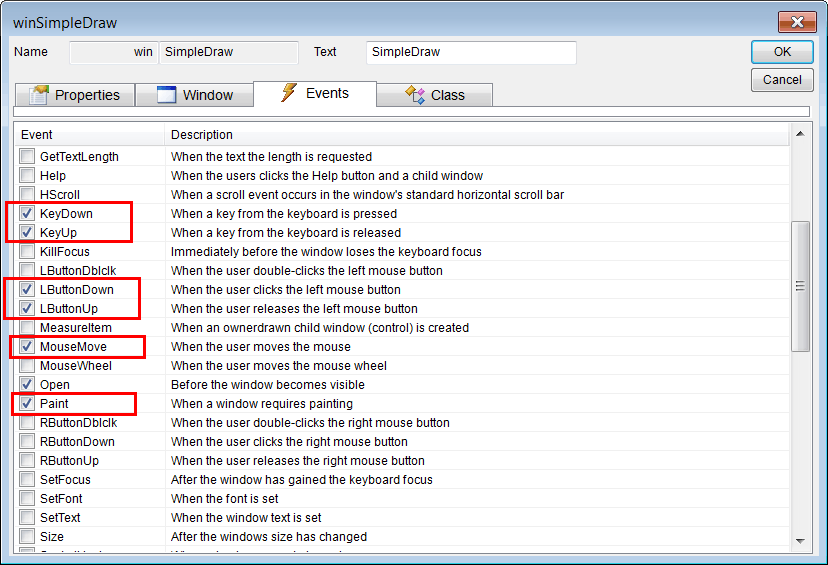
Open Wintempla and click anywhere in the window to set the events shown. Add the events:
Abra Wintempla y haga clic en cualquier parte de la ventana para fijar los eventos como se muestra. Agregue los eventos:
|
| Step B |
| Add a new class called DrawDoc. Then, edit the class files as shown below. Agregue una nueva clase llamada DrawDoc. Entonces, edite los archivos de la clase como se muestra. |
| DrawDoc.h |
| #pragma once class DrawDoc { public: DrawDoc(void); ~DrawDoc(void); vector<RECT> data; bool Save(const wchar_t *filename); bool Load(const wchar_t *filename); void Paint(CG::Gdi& gdi); }; |
| DrawDoc.cpp |
| #include "stdafx.h" #include "DrawDoc.h" DrawDoc::DrawDoc(void) { } DrawDoc::~DrawDoc(void) { } void DrawDoc::Paint(CG::Gdi& gdi) { const int count = data.size(); if (count == 0) return; for(int i = 0; i < count; i++) { gdi.Rectangle(data[i]); } } bool DrawDoc::Save(const wchar_t *filename) { Sys::File file; if (file.CreateForWritting(filename) == false) return false; const int count = data.size(); //____________________________ Store the number of rectangles in the file if (file.Write(count) == false) return false; //____________________________ Store each rectangle int bytes = sizeof(RECT); for(int i = 0; i < count; i++) { if (file.Write(&data[i], bytes) == false) return false; } return true; } bool DrawDoc::Load(const wchar_t *filename) { //________________________________________ Delete previous data data.clear(); // Sys::File file; if (file.CreateForReading(filename) == false) return false; //____________________________ Get the number of rectangles int count = 0; if (file.Read(count) == false) return false; //____________________________ Memory allocation data.resize(count); //____________________________ Read each rectangle int bytes = sizeof(RECT); for(int i = 0; i < count; i++) { if (file.Read(&data[i], bytes) == false) return false; } return true; } |
| Step C |
| Edit the SimpleDraw class files as show. |
| SimpleDraw.h |
| #pragma once //______________________________________ SimpleDraw.h #include "Resource.h" #include "DrawDoc.h" class SimpleDraw: public Win::Window { public: SimpleDraw() { initialX = -1; initialY = -1; isDragging = false; rectPrevious.left = 0; rectPrevious.right = 0; rectPrevious.right = 0; rectPrevious.top = 0; isCrtlPressed = false; } ~SimpleDraw() { } DrawDoc doc; bool isCrtlPressed; int initialX; int initialY; bool isDragging; RECT rectPrevious; const wchar_t * GetClassName(){return L"SIMPLEDRAW";} protected: //______ Wintempla GUI manager section begin: DO NOT EDIT AFTER THIS LINE ... }; |
| SimpleDraw.cpp |
| ... void SimpleDraw::Window_Open(Win::Event& e) { doc.Load(L"tmp.dat"); } void SimpleDraw::Window_Destroy(Win::Event& e) { doc.Save(L"tmp.dat"); } void SimpleDraw::Window_LButtonDown(Win::Event& e) { const int x = LOWORD(e.lParam); const int y = HIWORD(e.lParam); initialX = x; initialY = y; isDragging = true; rectPrevious.left = x; rectPrevious.top = y; rectPrevious.right = x; rectPrevious.bottom = y; } void SimpleDraw::Window_LButtonUp(Win::Event& e) { isDragging = false; const int x = LOWORD(e.lParam); const int y = HIWORD(e.lParam); //___________________________________ Erase the previous rectangle CG::Gdi gdi(hWnd, false, true); gdi.SelectNullBrush(); const int previousMode = gdi.SetROP2(R2_NOT); if (::IsRectEmpty(&rectPrevious) == false) gdi.Rectangle(rectPrevious); gdi.SetROP2(previousMode); //___________________________________ Create the new Rectangle RECT rect; rect.left = min(x, initialX); rect.top = min(y, initialY); rect.right = max(x, initialX); rect.bottom = max(y, initialY); doc.data.push_back(rect); //___________________________________ Repaint the area covered by the new rectangle this->Repaint(&rect, true); } void SimpleDraw::Window_MouseMove(Win::Event& e) { if (isDragging == false) return; const int x = LOWORD(e.lParam); const int y = HIWORD(e.lParam); CG::Gdi gdi(hWnd, false, true); gdi.SelectNullBrush(); //________________________________________ Set drawing mode to R2_NOT const int previousMode = gdi.SetROP2(R2_NOT); //________________________________________ Erase the previous rectangle if (::IsRectEmpty(&rectPrevious) == FALSE) gdi.Rectangle(rectPrevious); //________________________________________ Draw the new rectangle rectPrevious.left = min(x, initialX); rectPrevious.top = min(y, initialY); rectPrevious.right = max(x, initialX); rectPrevious.bottom = max(y, initialY); gdi.Rectangle(rectPrevious); //_______________________________________ Restore drawing mode to normal gdi.SetROP2(previousMode); } void SimpleDraw::Window_Paint(Win::Event& e) { CG::Gdi gdi(hWnd, true, false); doc.Paint(gdi); } void SimpleDraw::Window_KeyDown(Win::Event& e) { switch (e.wParam) { case VK_CONTROL: isCrtlPressed = true; break; case'C': if (isCrtlPressed == true) { //_________________________ Create a bitmap from the window client area CG::DDBitmap bitmap; bitmap.CreateFromWindowClientArea(hWnd, false); //_________________________ Copy the bitmap to the clipboard Win::Clipboard::CopyDDBToClipboard(hWnd, bitmap); } break; } } void SimpleDraw::Window_KeyUp(Win::Event& e) { switch (e.wParam) { case VK_CONTROL: isCrtlPressed = false; break; } } |
| Tip |
| The Window_Open function loads the current data from the tmp.dat file. The Window_Destroy function stores the current document in the tmp.dat file before destroying the window. La función Window_Open carga los datos actuales desde el archivo tmp.dat. La función Window_Destroy almacena el documento en el archivo tmp.dat antes de destruir la ventana. |
| Tip |
| The Window_LButtonDown function stores the current position of the mouse at the moment the user clicks on the window. The isDragging flag is set to true to indicate that the user is pressing the button while moving the mouse. The rectPrevious rectangle is set to an empty rectangle. La función Window_LButtonDown almacena la posición actual del ratón en el momento en el que el usuario hace clic en la ventana. La bandera isDragging se fija en true para indicar que el usuario está presionando el botón mientras que mueve el ratón. El rectángulo rectPrevious se fija en un rectángulo vacío. |
| Tip |
| The Window_MouseMove function set the mode to R2_NOT. This mode allows drawing and erasing from the screen. The first time an object is draw using R2_NOT the object will be seen. The second time the same object is draw using R2_NOT the object will disappeared. This function erases the previous rectangle, and draws a rectangle in the new position. This allows the user to know where the final rectangle will be placed. La función Window_MouseMove fija el modo en R2_NOT. Este modo permite dibujar y borrar en la pantalla. La primera vez que un objeto se dibuja usando R2_NOT el objeto se verá en la pantalla. La segunda vez que el mismo objeto se dibuja usando R2_NOT el objeto desaparecerá. Esta función borra el rectángulo previo, y dibuja un rectángulo en la nueva posición. Esto le permite ver al usuario dónde quedará el rectángulo final. |
| Tip |
| The Window_LButtonUP function deletes the last rectangle draw by Window_MouseMove. Creates a new rectangle and insert the new rectangle in the vector variable of the document. Finally, it repaints the area covered by the new rectangle. La función Window_LButtonUp borra el último rectángulo dibujado por Window_MouseMove. Crea un nuevo rectángulo e inserta el nuevo rectángulo en la variable del tipo vector del documento. Finalmente, se repita el área cubierta por el nuevo rectángulo. |
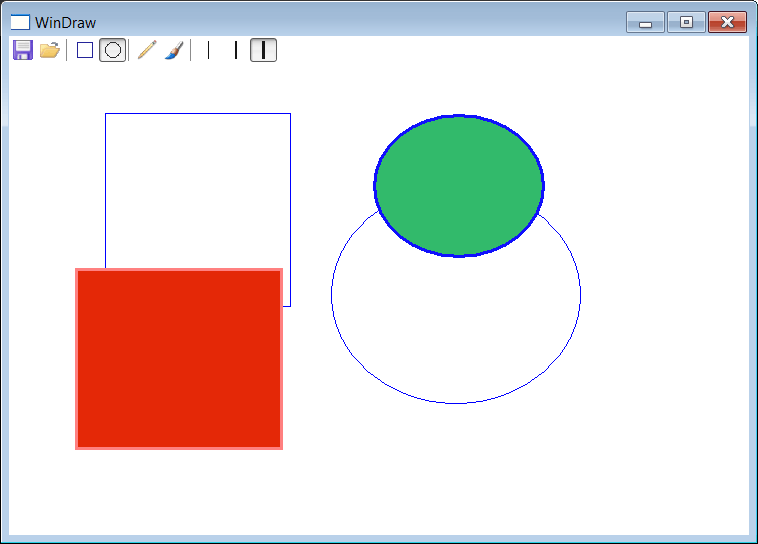
| Problem 2 |
Create a simple Window Application called WinDraw to draw circles and rectangles. The toolbar options allow:
Cree una aplicación de ventana llamada WinDraw para dibujar círculos y rectángulos. Las opciones de la barra de herramientas permiten:
|