The splitter control |
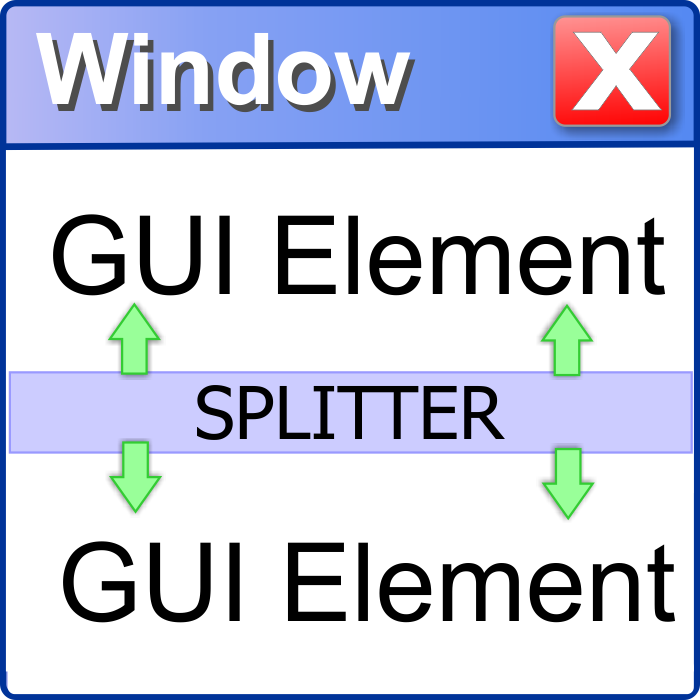
| It allows dividing a rectangular area in two parts. Each part has one GUI element (a Windows control). A splitter can be horizontal or vertical. In a horizontal splitter, there is one control at the top of the rectangular area, and another control at the bottom of the rectangular area as shown in the figure below. The user can use the splitter to change the height of both controls. Este permite dividir una área rectangular en dos partes. Cada parte tiene un elemento GUI (un control de Windows). Un splitter puede ser horizontal o vertical. En un splitter horizontal, hay un control en la parte superior del área rectangular, y otro control en la parte inferior del área rectangular como se muestra en la figura de abajo. El usuario puede usar el splitter para cambiar la altura de ambos controles. |
| Tip |
| A splitter is useful when there are two GUI elements that can benefit of having more screen space. For instance, the number of items that a List View control can show at a time is proportional to the space it takes in the windows. Thus, a big List View control is more pleasant because the user does not have to too much the scrollbars. On the other hand, a big button does not offer any advantages. Un splitter es útil cuando hay dos elementos GUI que pueden beneficiarse de tener más espacio en la pantalla. Por ejemplo, el número de artículos que un control de List View puede mostrar a la vez es proporcional al espació que éste ocupa en la ventana. Así, un control de List View grande es más agradable porque el usuario no tiene que usar tanto las barras de desplazamiento. Por otro lado, un botón grande no ofrece ninguna ventaja. |
| Problem 1 |
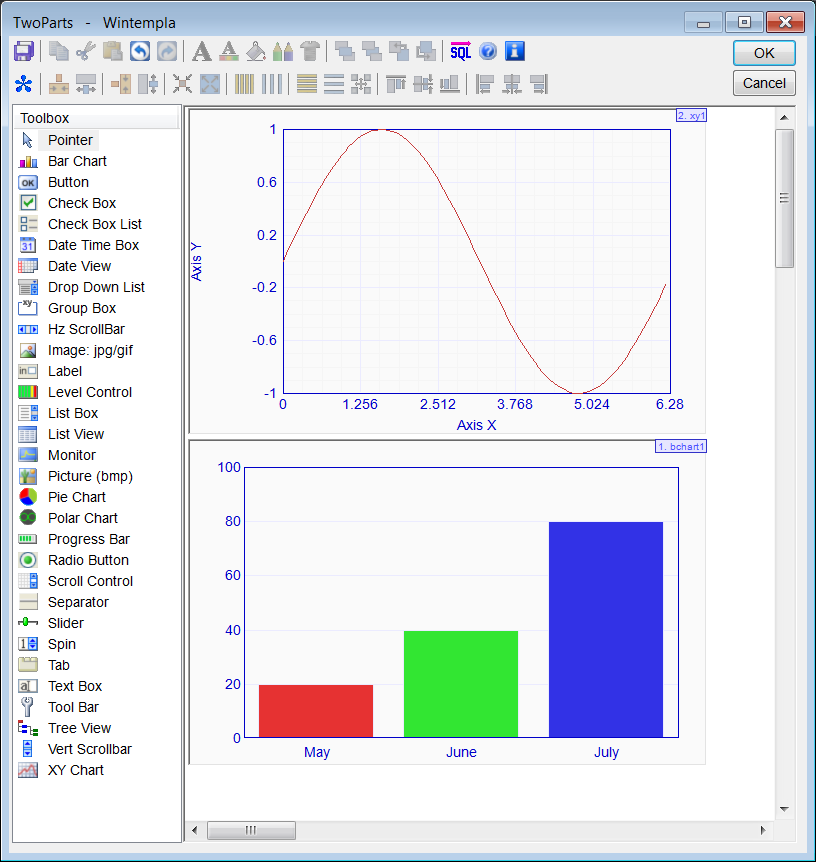
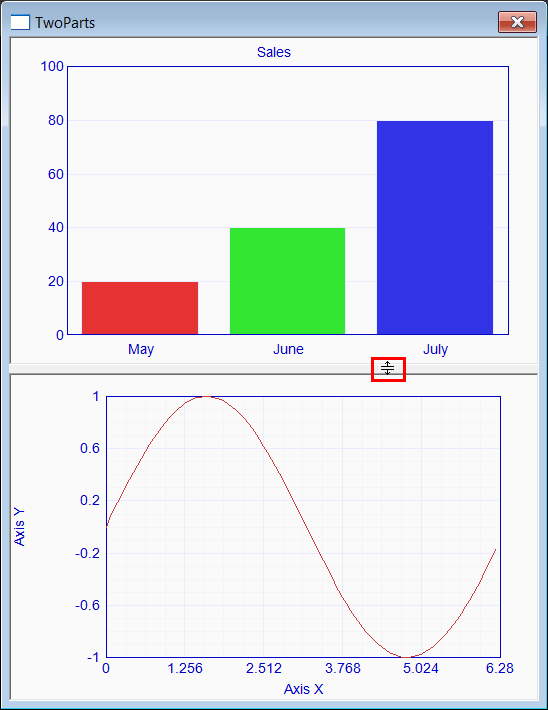
| Create a Wintempla Dialog application called TwoParts. After creating the project, insert a XyChart control, and a BarChart control as shown. Cree una aplicación de Diálogo de Wintempla llamada TwoParts. Después de crear el proyecto, inserte un control de XyChart, y un control de BarChart como se muestra. |
| Step A |
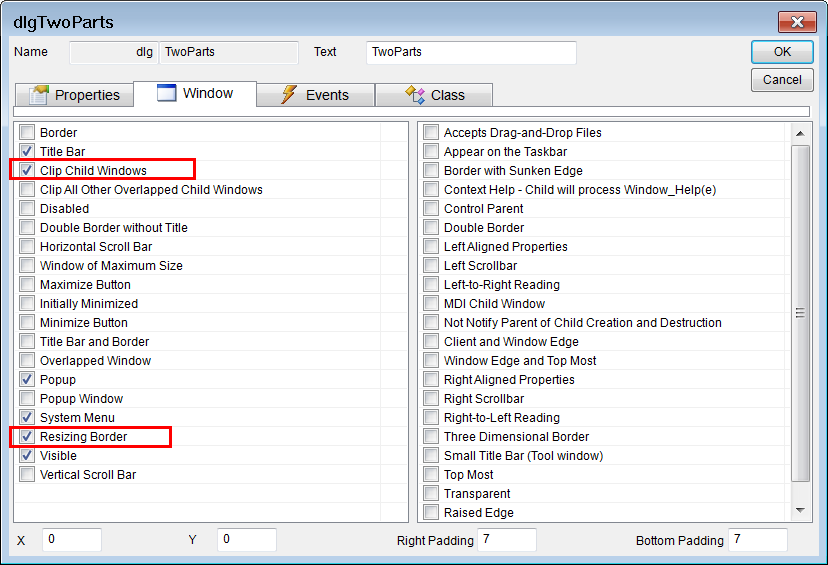
| Open Wintempla and click anywere in the dialog to open the Dialog Properties Window as shown. Select the properties: Clip Child Windows and Resizing border. The Clip Child Windows property reduces flickering when the user changes the size of the window. Abra Wintempla y haga clic en cualquier parte del diálogo para abrir la ventana de propiedades del diálogo como se muestra. Seleccione las propiedades: Clip Child Windows y Resizing border. La propiedad de Clip Child Windows reduce el parpadeo cuando el usuario cambio de tamaño la ventana. |
| Step B |
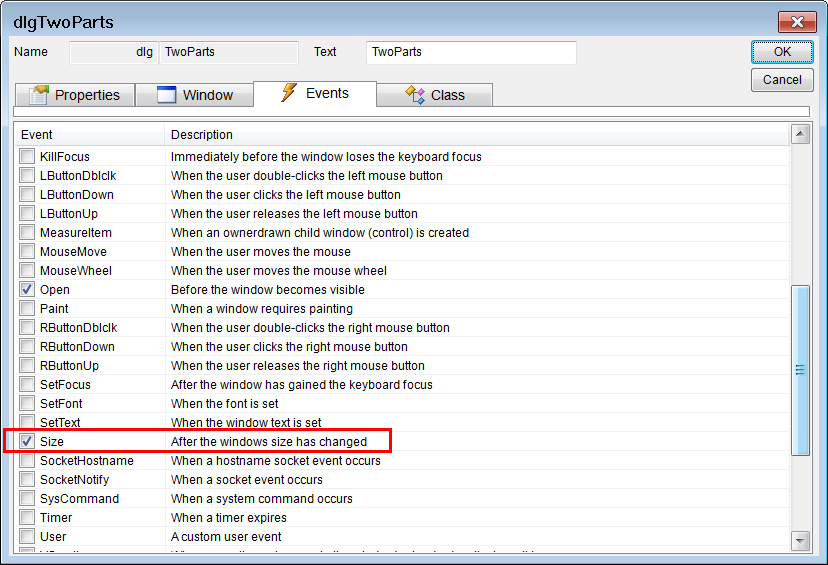
| Click on the Event tab and mark the Size event as shown below. This event fires every time the size of the dialog changes. Haga clic en la pestaña de Event y marque el evento Size como se muestra debajo. Este evento se activa cada vez que el tamaño del diálogo cambia. |
| Step C |
| Edit the files TwoParts.h and TwoParts.cpp as shown. Edite los archivos TwoParts.h y TwoParts.cpp como se muestra. |
| TwoParts.h |
| #pragma once //______________________________________ TwoParts.h #include "Resource.h" class TwoParts : public Win::Dialog { public: TwoParts() { } ~TwoParts() { } Win::HorizontalSplitter splitter; protected: ... }; |
| TwoParts.cpp |
| ... void TwoParts::Window_Open(Win::Event& e) { //________________________________________________________ bchart1 bchart1.Bars.Add(L"May", RGB(230, 50, 50), 20.0); bchart1.Bars.Add(L"June", RGB(50, 230, 50), 40.0); bchart1.Bars.Add(L"July", RGB(50, 50, 230), 80.0); bchart1.MaxY = 100.0; bchart1.Text = L"Sales"; //________________________________________________________ xy1 xy1.CaptionX = L"Axis X"; xy1.CaptionY = L"Axis Y"; xy1.MinX = 0.0; xy1.MaxX = 6.28; xy1.MinY = -1.0; xy1.MaxY = 1.0; xy1.Graphs.Add(100); for (int i = 0; i<100; i++) { xy1.Graphs[0][i].x = i*6.28 / 100; xy1.Graphs[0][i].y = sin(i*6.18 / 100); } //xy1.Graphs[0].Color = RGB(0, 0, 255); //xy1.Graphs[0].Type(Win::Graph::circle); //xy1.Graphs[0].Caption(L"My Function"); xy1.RefreshAll(); //___________________________________________________ splitter splitter.Setup(hWnd, 200); //splitter.offsetLeft = 50; //splitter.offsetTop = 100; splitter.childTop = xy1; splitter.childBottom = bchart1; splitter.UpdateChildrenPosition(); } void TwoParts::Window_Size(Win::Event& e) { splitter.UpdateChildrenPosition(); } |
| Tip |
| You should be able to change the size of the charts by dragging with the mouse the splitter which is located between the bar chart and the xy chart. Usted debe poder cambiar el tamaño de las gráfica arrastrando con el ratón el splitter el cual es localizado entre el gráfica de barras y la gráfica xy. |
Splitter Offset |
| By default, the splitter is designed so that the two controls occupy the whole window. A splitter has two offset variables called offsetLeft and offsetTop to leave room for other GUI elements. Por defecto, el splitter está diseñado para que los dos controles ocupen toda la ventana. Un splitter tiene dos variables de offset llamadas offsetLeft y offsetTop para dejar espacio para otros elementos GUI. |
| Tip |
| If you combine a splitter with Docking, you must call the Window_Size function of the Base class so that both technologies can work as shown in the following code. Si usted combina un splitter con Docking, usted debe llamar la función Window_Size de la clase Base para que ambas tecnologías puedan operar como se muestra en la figura de abajo. |
| Program.cpp |
| //___________________________________________ For a Dialog void Program::Window_Size(Win::Event& e) { Win::Dialog::Window_Size(e); splitter.UpdateChildrenPosition(); } |
| Program.cpp |
| //___________________________________________ For a Window void Program::Window_Size(Win::Event& e) { Win::Window::Window_Size(e); splitter.UpdateChildrenPosition(); } |