| Tip |
| A button may have: text, a bitmap or an Icon. The main difference between the bitmap and the icon is that the icon may have a transparent background. Un botón puede tener: texto, un mapa de bits (bitmap) o un icono. La principal diferencia entre el bitmap y el icono es que el icono puede tener un fondo transparente. |
| Problem 1 |
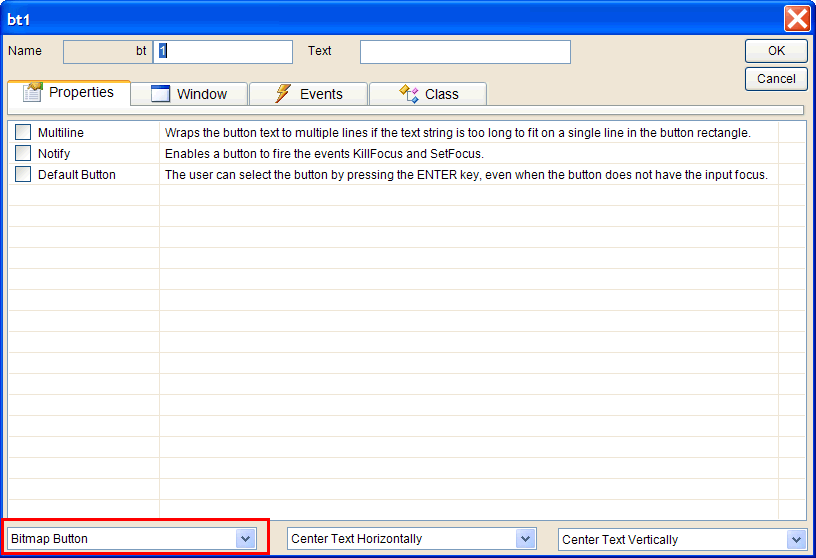
| Create a Wintempla dialog application called ImageButton. BE SURE to use a Dialog Application with toolbar icons) when creating the project. After the application has been created, open Wintempla and insert a button as shown below. Set the button type to bitmap. Cree una aplicación de diálogo llamada ImageButton. ASEGURESE de usar una Dialog Application with toolbar icons cuando cree el proyecto. Después de crear la aplicación, abra Wintempla e inserte un botón como se muestra debajo. Fije el tipo de botón a bitmap. |
| Step A |
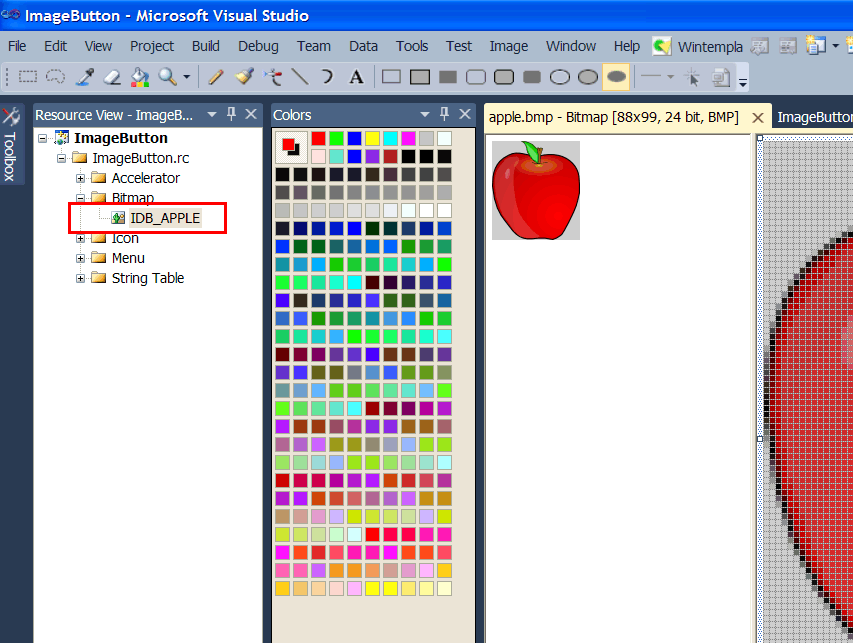
| The image may be a filename or a resource. In this case, we will use the bitmap include in resource view as shown below. Get an uncompressed BMP file, i.e., apple.bmp. Copy the file to the project file, i.e. c:\MyProjects\ImageButton\ImageButton\apple.bmp. From Resource View, select ImageButton.rc and right click to open the context menu and select Add Resource. Then, select Bitmap and click on Import. Be sure to change the ID of the bitmap to IDB_APPLE as displayed. La imagen puede ser un nombre de archivo o un recurso. En este caso, usaremos un mapa de bits incluido en la vista de recursos como se muestra debajo. Consiga un archivo sin compresión BMP, por ejemplo: apple.bmp. Copie el archivo a la carpeta del proyecto, por ejemplo: c:\MyProjects\ImageButton\ImageButton\apple.bmp. Desde la Vista de Recursos, seleccione ImageButton.rc y haga clic con el botón derecho para abrir el menú de contexto y seleccione Add Resource. Entonces, seleccione el Bitmap y haga clic en Import. Asegúrese de cambiar el ID del bitmap a IDB_APPLE como se muestra. |
| Step B |
| Edit the ImageButton.h file as shown below. Edite el archivo ImageButton.h como se muestra debajo. |
| ImageButton.h |
| #pragma once //______________________________________ ImageButton.h #include "resource.h" class ImageButton: public Win::Dialog { public: ImageButton() { } ~ImageButton() { } Sys::Icon iconClient; // Transparent Background //CG::DDBitmap bitmapApple; protected: //______ Wintempla GUI manager section begin: DO NOT EDIT AFTER THIS LINE Win::Button bt1; . . . }; |
| Step C |
| Edit the ImageButton.cpp file as shown below and execute the program. Edite el archivo ImageButton.cpp como se muestra debajo y ejecute el programa. |
| ImageButton.cpp |
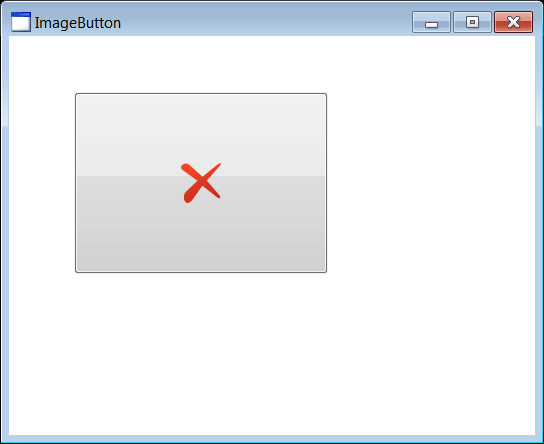
| #include "stdafx.h" //________________________________________ ImageButton.cpp #include "ImageButton.h" int APIENTRY wWinMain(HINSTANCE hInstance, HINSTANCE , LPTSTR cmdLine, int cmdShow){ ImageButton app; return app.BeginDialog(IDI_IMAGEBUTTON, hInstance); } void ImageButton::Window_Open(Win::Event& e) { //__________________________________________________ For Bitmap buttom //bitmapApple.CreateFromResource(hInstance, IDB_APPLE); //bt1.SetImage(bitmapApple); //__________________________________________________ For Icon buttom iconClient.Load(hInstance, IDI_DELETE); bt1.SetImage(iconClient); } void ImageButton::bt1_Click(Win::Event& e) { } |
| Tip |
| As computers may have displays with different DPI values, the button size may be different in each computer. Consequently, the image in the button may not fit inside the button or in can displayed in a too small size. The next example illustrates how to fix this. Como las computadoras pueden tener pantallas con diferentes valores de DPI, el tamaño del botón puede ser diferente en cada computadora. Consequentemente, la imagen en el botón puede no caber dentro del botón, o puede verse demasiado pequeña. El siguiente ejemplo ilustra como corregir esto. |
| Problem 2 |
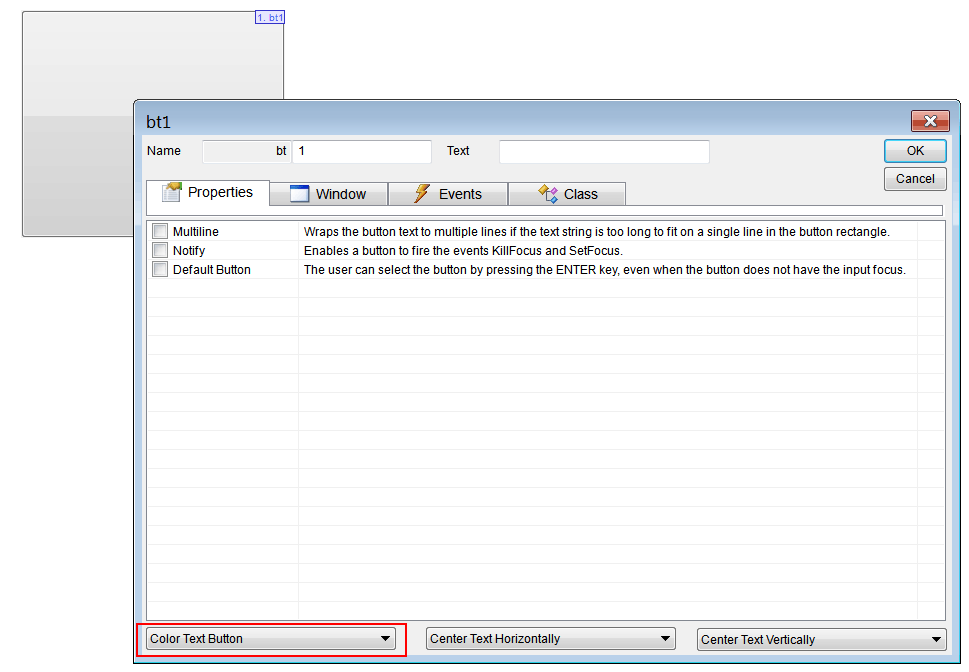
| Create a Wintempla dialog application called FitImageButton. BE SURE to use a Dialog Application with toolbar icons) when creating the project. After the application has been created, open Wintempla and insert a button as shown below. Set the button type to Color Text Button. Cree una aplicación de diálogo llamada FitImageButton. ASEGURESE de usar una Dialog Application with toolbar icons cuando cree el proyecto. Después de crear la aplicación, abra Wintempla e inserte un botón como se muestra debajo. Fije el tipo de botón a Color Text Button. |
| Step A |
| The image may be a filename or a resource. In this case, we will use the bitmap include in resource view as shown below. See previous problem. La imagen puede ser un nombre de archivo o un recurso. En este caso, usaremos un mapa de bits incluido en la vista de recursos como se muestra debajo. Vea el problema previo. |
| Step B |
| Edit the FitImageButton.h file as shown below. Edite el archivo FitImageButton.h como se muestra debajo. |
| FitImageButton.h |
| #pragma once //______________________________________ FitImageButton.h #include "Resource.h" class FitImageButton: public Win::Dialog { public: FitImageButton() { } ~FitImageButton() { } CG::DDBitmap bitmapApple; protected: . . . }; |
| Step C |
| Edit the FitImageButton.cpp file as shown below and execute the program. Edite el archivo FitImageButton.cpp como se muestra debajo y ejecute el programa. |
| FitImageButton.cpp |
| ... void FitImageButton::Window_Open(Win::Event& e) { bitmapApple.CreateFromResource(hInstance, IDB_APPLE); } void FitImageButton::bt1_Click(Win::Event& e) { } void FitImageButton::bt1_DrawItem(Win::Event& e) { DRAWITEMSTRUCT * pDrawItem = (DRAWITEMSTRUCT *)e.lParam; bt1.DrawButton(pDrawItem, bitmapApple); e.returnValue = TRUE; } |
