BMP |
| A BMP file does not lose any image detail and is one of the best formats. Unfortunately, the file size is usually big. Un archivo BMP no pierde los detalles de la imagen y es uno de los mejores formatos. Desafortunadamente, el tamaño del archivo es usualmente grande. |
Resource |
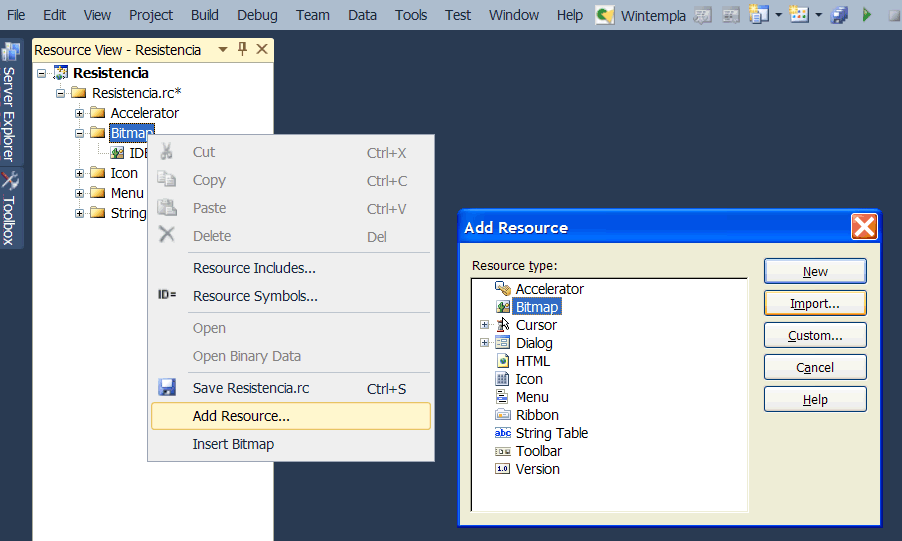
| A program with extension *.exe may contain inside other files. This is extremely useful because if a program requires images, they can be included inside the executable main file. Microsoft Visual Studio has a the Resource View to manage the files that may be included in the main file. Usually the Resource View is found under the View menu. Un programa con extensión *.exe puede contener otros archivos dentro. Esto es extremadamente útil porque si un programa requiere de imágenes, estas pueden ser incluidas dentro del archivo ejecutable principal. Microsoft Visual Studio tiene la Vista de Recursos para administrar los archivos que se pueden incluir en el archivo principal. Usualmente la Vista de Recursos se encuentra en el menú de Vista. |
| Tip |
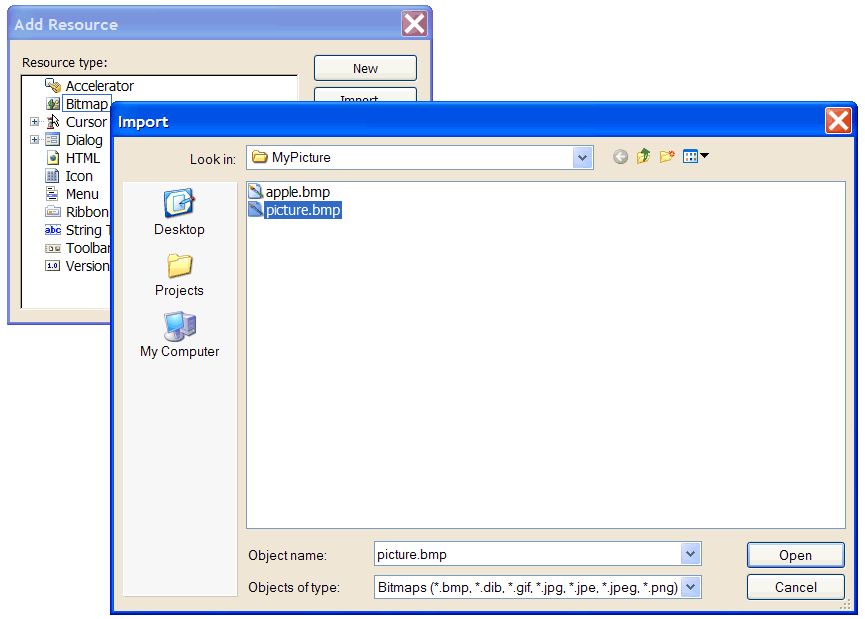
| A new image or an existing BMP image can be inserted into a Microsoft Visual Studio project (see the figure below). From the menu: View > Resource View > Bitmap > Insert Bitmap or Import Bitmap (using an existing *.bmp file). Una imagen nueva o una BMP existente puede ser insertada en un proyecto de Microsoft Visual Studio (vea la figura de abajo). Desde el menu: View > Resource View > Bitmap > Insert Bitmap o bien exportar el bitmap de un archivo *.bmp existente). |
ID |
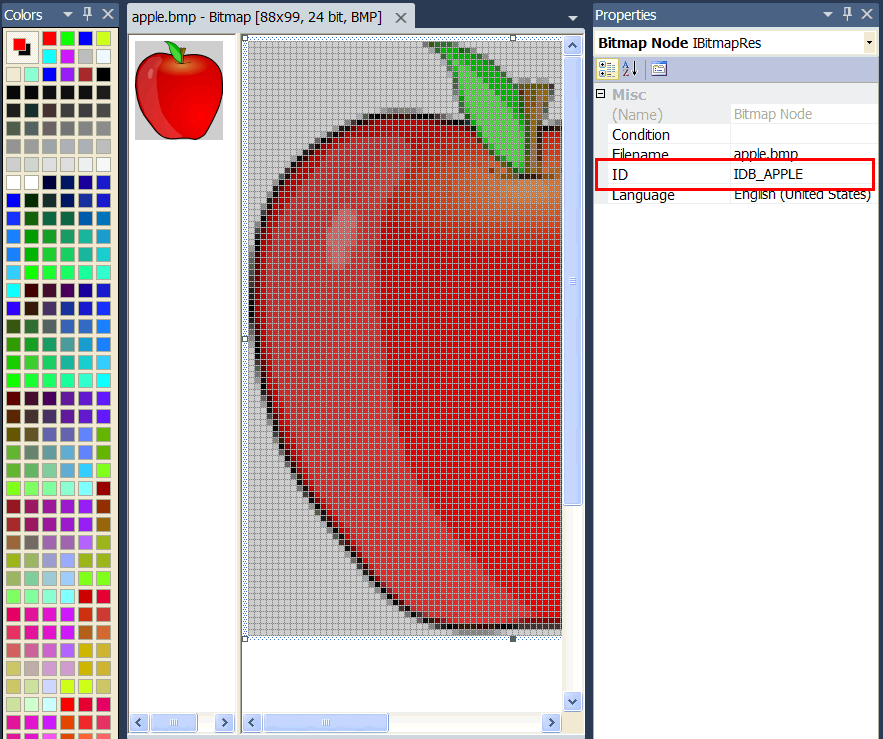
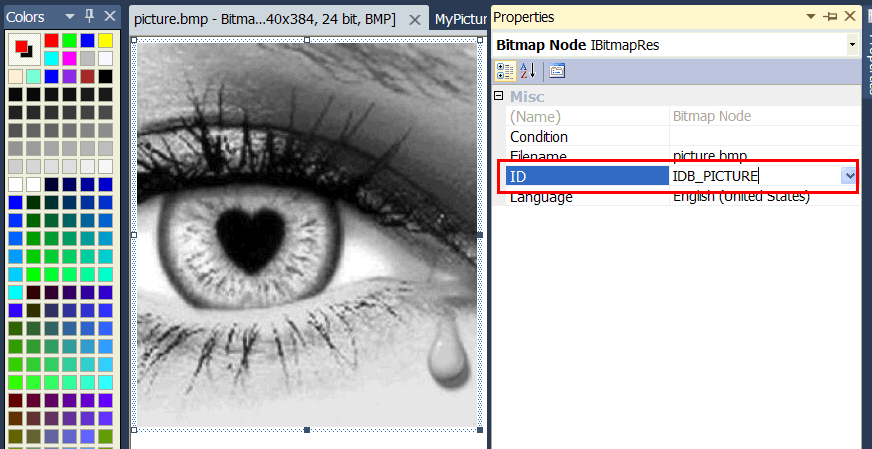
| All resources have an ID. The ID is used to identify the resource so that it can be used in the program. Microsoft Visual Studio assigns these IDs following some rules; a bitmap ID begins with IDB_. Use the property view to change the ID of any resource (see figure below). Use only uppercase characters for the ID. Todos los recursos tienen un nombre de identificación conocido como ID. El ID es usado para identificar el recurso de tal forma que este pueda ser usado en el programa. Microsoft Visual Studio asigna los ID siguiendo ciertas reglas; la ID de un bitmap comienza siempre con IDB_. Use la vista de propiedades para cambiar el ID de cualquier recurso (vea la figura de abajo). Use solamente letras mayúsculas para la ID. |
| Tip |
| When managing resources, Microsoft Visual Studio edits two text files: resource.h and Program.rc. You must edit these files manually, if you require performing many resource operations. Cuando se administran los recursos, Microsoft Visual Studio edita dos archivos de texto: resource.h y Program.rc. Usted puede editar estos archivos manualmente, si necesita realizar muchas operaciones de recursos. |
| Tip |
Una vez que un bitmap ha sido incluido (como un recurso en un programa) un control de Picture puede ser usado para mostrar el bitmap. Para hacer esto, abra Wintempla e inserte un control de Picture en la GUI. Use el ID respectivo del bitmap de tal forma que la imagen pueda ser mostrada en el control picture. |
| Problem 1 |
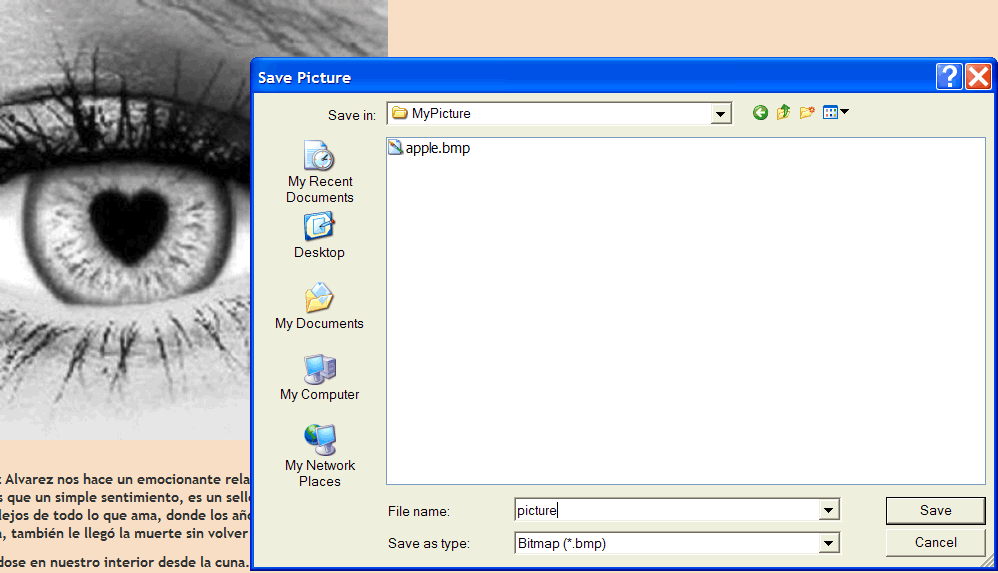
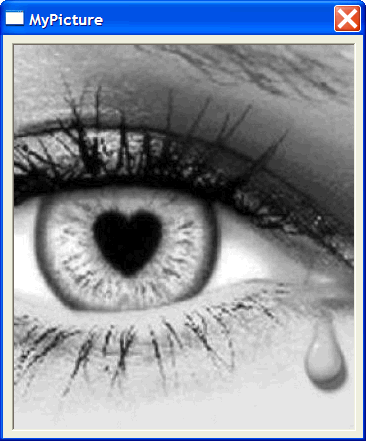
| Create a program called MyPicture to display a bitmap. After creating the project, use Wintempla to insert a Picture control. Find an image in the Internet with the extension BMP. Name the file picture.bmp and place the file in your project folder. Use the resource view and the context menu to import the bitmap. Use the Properties View to set the ID of the image to IDB_PICTURE. If the Properties View is not open, use the View menu to open it. If you cannot change the ID of the bitmap, select the bitmap in Resource View, and then, right click to open the context menu, select Properties. Cree un programa llamado MyPicture para mostrar un bitmap. Después de crear el proyecto, use Wintempla para insertar un control Picture. Consiga una imagen en la Internet con la extensión BMP. Fije al nombre del archivo picture.bmp y coloque el archivo en la carpeta de su proyecto. Usa la vista de recursos y el menú de contexto para importar el bitmap. Usa la vista de Propiedades para fijar el ID de la imagen a IDB_PICTURE. Si la vista de Propiedades no está abierta, use el menú de Vista para abrirla. Si usted no puede cambiar el ID del bitmap, seleccione el bitmap en la Vista de Recursos, y luego haga clic derecho para abrir el menú de contexto, seleccione propiedades. |
| MyPicture.h |
| #pragma once //______________________________________ MyPicture.h #include "resource.h" class MyPicture: public Win::Dialog { public: MyPicture() { } ~MyPicture() { } CG::DDBitmap bitmap; . . . }; |
| MyPicture.cpp |
| void MyPicture::Window_Open(Win::Event& e) { //________________________________________________________ pic1 bitmap.CreateFromResource(this->hInstance, IDB_PICTURE); pic1.SetImage(bitmap); } |
| TwoDisplay.h |
| #pragma once //______________________________________ TwoDisplay.h #include "resource.h" class TwoDisplay: public Win::Dialog { public: TwoDisplay() { } ~TwoDisplay() { } CG::DDBitmap bmpMexico; CG::DDBitmap bmpArgentina; . . . }; |
| TwoDisplay.cpp |
| void TwoDisplay::Window_Open(Win::Event& e) { //________________________________________________________ 1. Load Bitmaps bmpMexico.CreateFromResource(this->hInstance, IDB_MEXICO); bmpArgentina.CreateFromResource(this->hInstance, IDB_ARGENTINA); //________________________________________________________ 2. Display image pic1.SetImage(bmpArgentina); } void TwoDisplay::btMexico_Click(Win::Event& e) { pic1.SetImage(bmpMexico); } void TwoDisplay::btArgentina_Click(Win::Event& e) { pic1.SetImage(bmpArgentina); } Tip The code below shows how to display a random image using a Picture control. <hr /> El código de abajo muestra como mostrar una imagen aleatoria usando un Picture control. |
| RandomDisplay.h |
| #pragma once //______________________________________ RandomDisplay.h #include "resource.h" class RandomDisplay: public Win::Dialog { public: RandomDisplay() { std::srand(std::time(nullptr)); } ~RandomDisplay() { } CG::DDBitmap bitmap[5]; . . . }; |
| RandomDisplay.cpp |
| void RandomDisplay::Window_Open(Win::Event& e) { //________________________________________________________ 1. Load Bitmaps bitmap[0].CreateFromResource(this->hInstance, IDB_MEXICO); bitmap[1].CreateFromResource(this->hInstance, IDB_ARGENTINA); bitmap[2].CreateFromResource(this->hInstance, IDB_CUBA); bitmap[3].CreateFromResource(this->hInstance, IDB_ECUADOR); bitmap[4].CreateFromResource(this->hInstance, IDB_CUBA); //________________________________________________________ 2. Display image pic1.SetImage(bitmap[0]); } void RandomDisplay::btChange_Click(Win::Event& e) { const int index = 1 + 5*std::rand() /(RAND_MAX + 1); pic1.SetImage(bitmap[index]); } |
| Problem 2 |
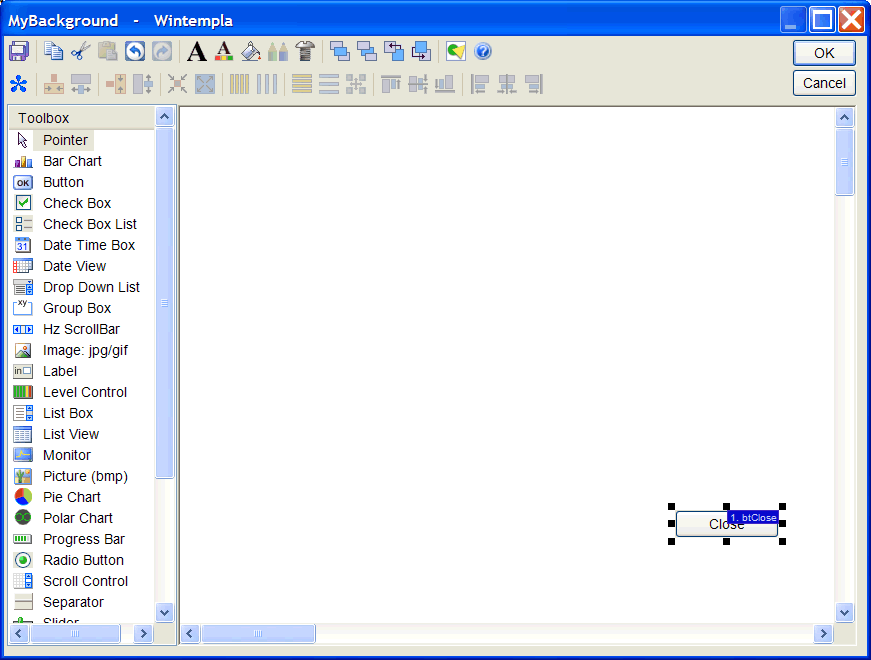
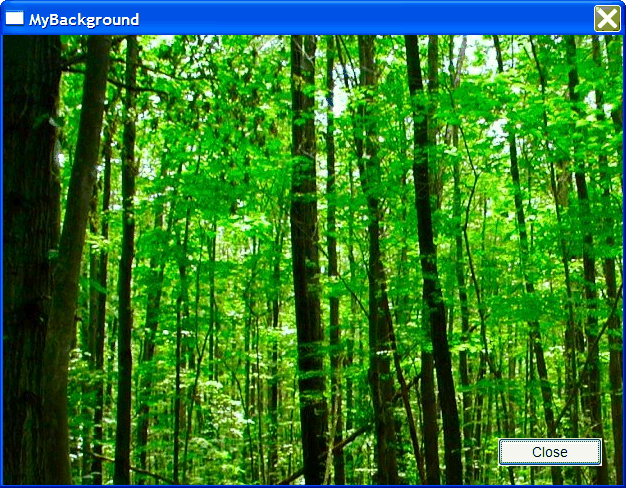
| Create a project called MyBackground to display an image in the background of the window. Cree un proyecto llamado MyBrackground para mostrar una imagen en el fondo de la ventana. |
| Step A |
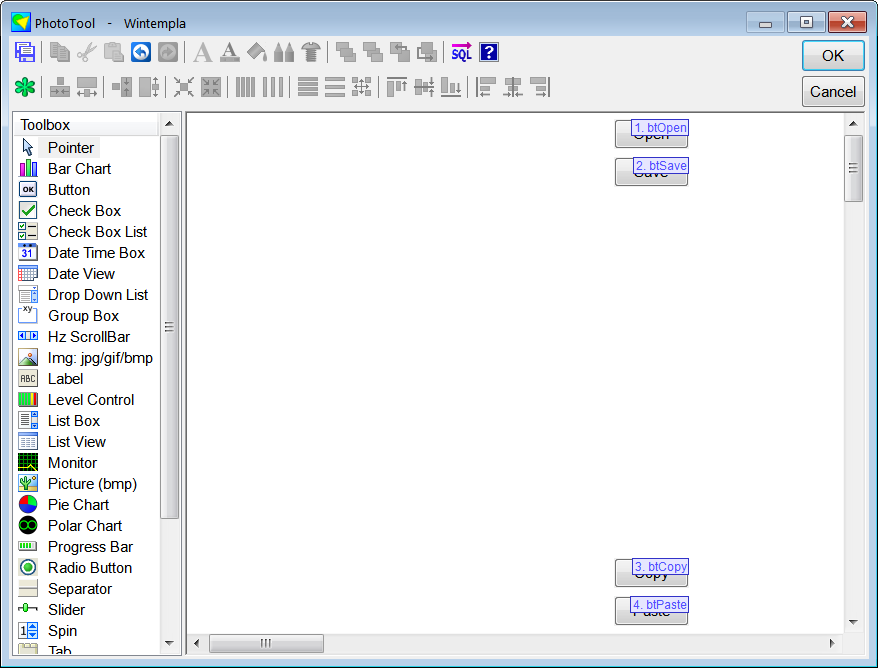
| Create the project and insert a button as shown below. Cree el proyecto e inserte un botón como se muestra debajo. |
| Step B |
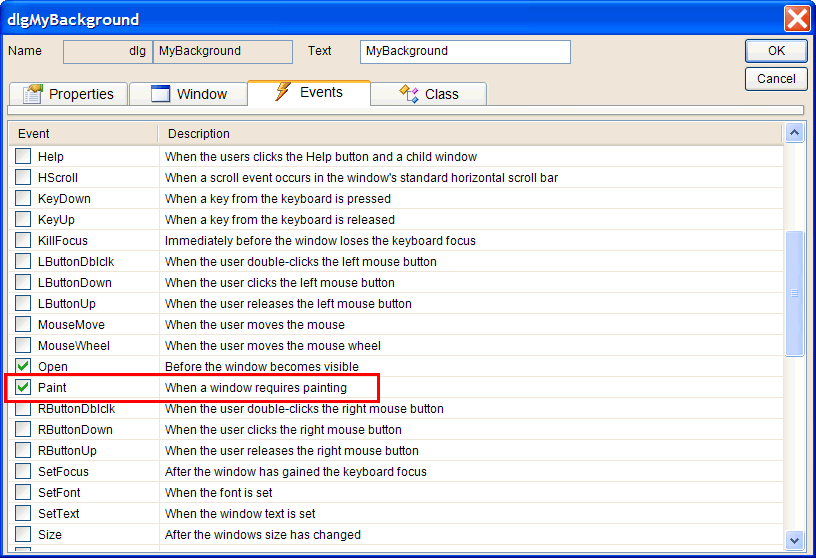
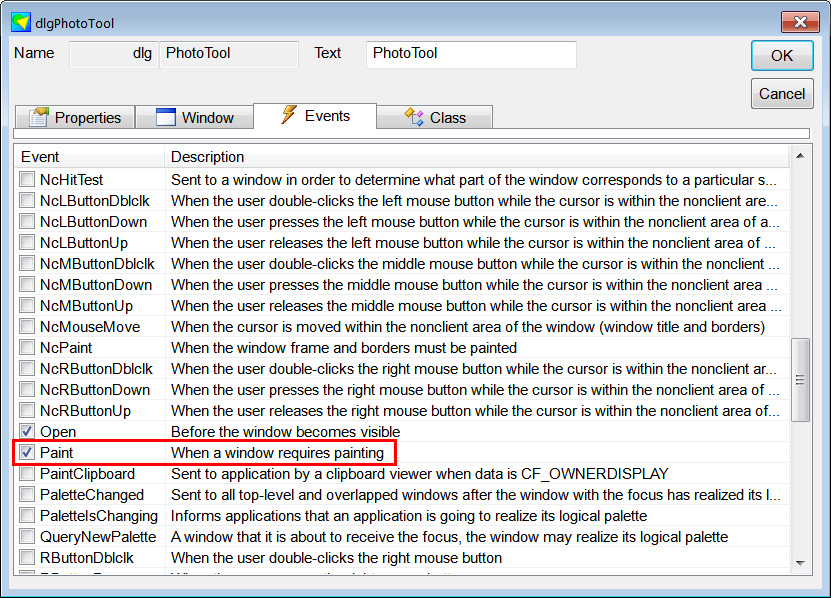
| Using Wintempla double click anywhere in the GUI outside the button to open the main window properties. Go to the Events tab and mark the event Paint as shown. Usando Wintempla haga doble clic en cualquier lugar en la GUI afuera del botón para abrir las propiedades de la ventana principal. Cámbiese a la pestaña de Events y marque el evento Paint como se muestra. |
| Step C |
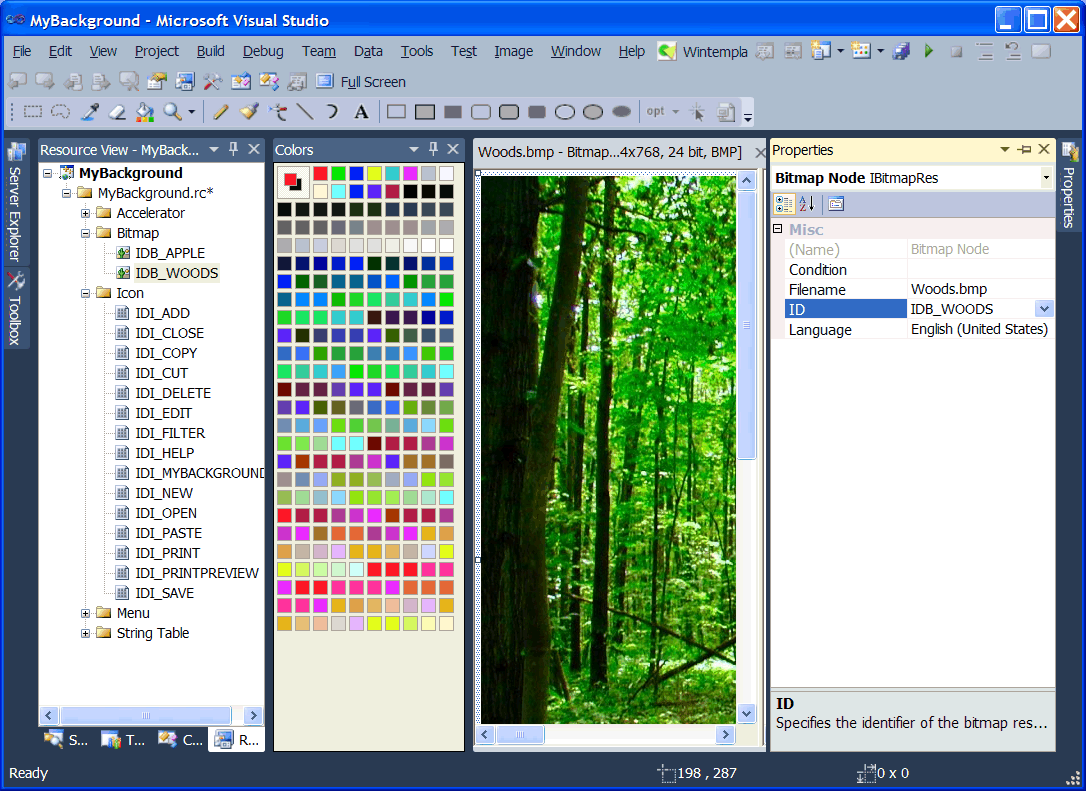
| Using Resource View add a BMP to the project. Set the name to IDB_WOODS. Usando la vista de recursos agregue un BMP al proyecto. Fije el nombre a IDB_WOODS. |
| MyBackground.h |
| #pragma once //______________________________________ MyBackground.h #include "resource.h" class MyBackground: public Win::Dialog { public: MyBackground() { } ~MyBackground() { } CG::DDBitmap bitmap; protected: . . . }; |
| MyBackground.cpp |
| void MyBackground::Window_Open(Win::Event& e) { bitmap.CreateFromResource(this->hInstance, IDB_WOODS); } void MyBackground::btClose_Click(Win::Event& e) { this->EndDialog(0); } void MyBackground::Window_Paint(Win::Event& e) { CG::Gdi gdi(hWnd, true, false); gdi.DrawBitmap(bitmap, 0, 0); } |
| Problem 3 |
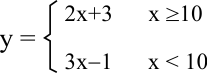
| Create a project called Rectas to implement the function displayed below. The program takes a value for x and returns a value for y. Input: x = 2 Output: y=5 Input: x= 11 Output: y=25 The GUI should have
Cree un proyecto llamado Rectas para implementar la función mostrada debajo. El programa toma un valor de x y regresa un valor para y. Entrada: x = 2 Salida: y = 5 Entrada: x= 11 Salida: y=25 La GUI puede tener:
|
| Problem 4 |
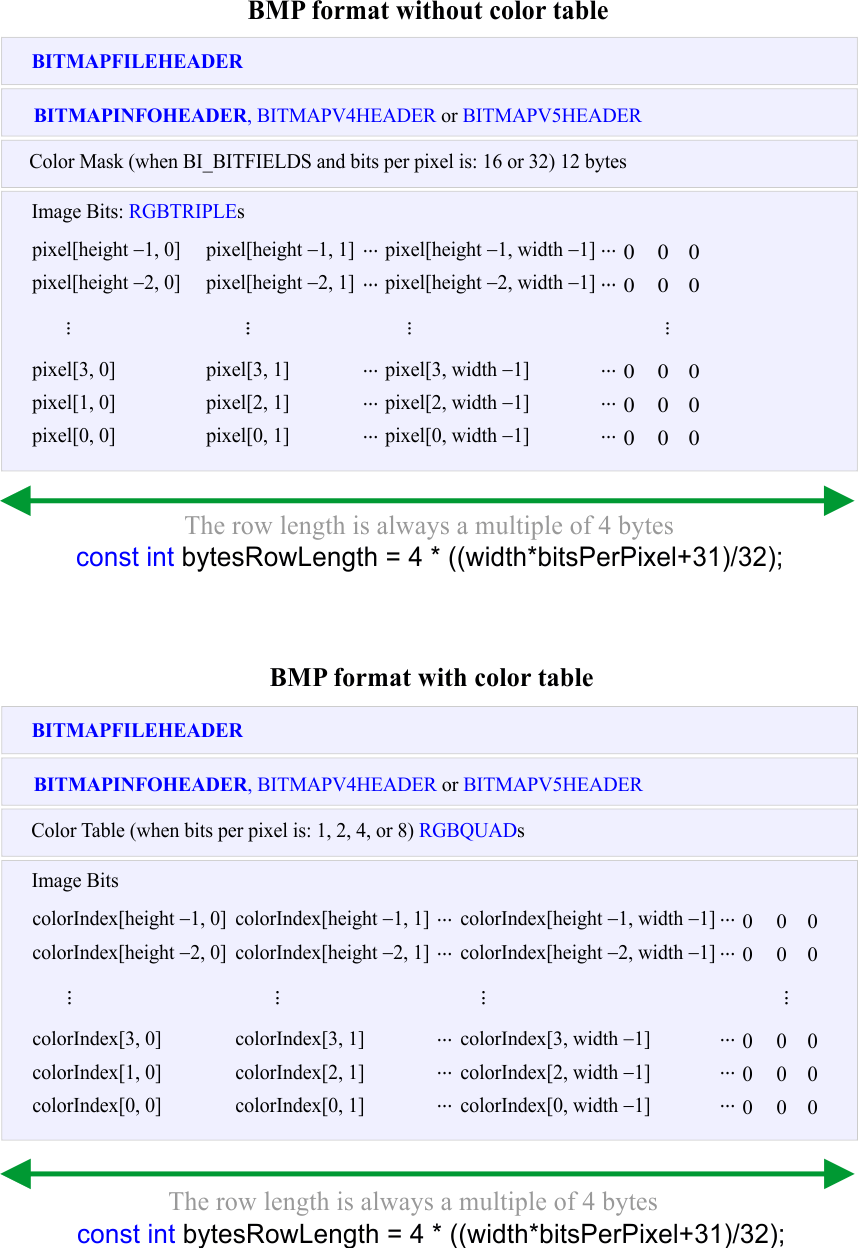
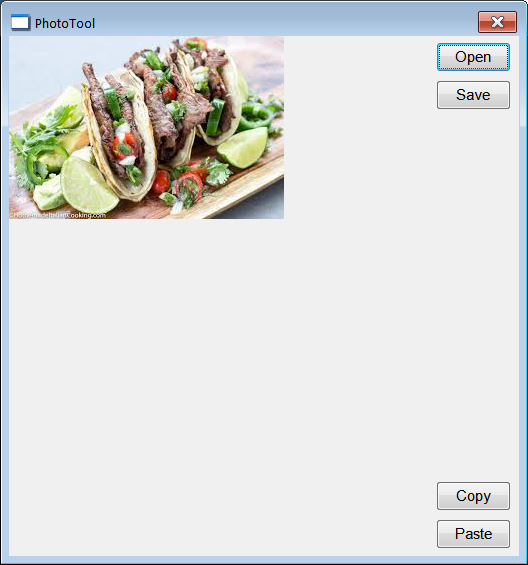
| Create a project called PhotoTool to display a Bitmap. The figure below shows the structure of a bitmap file (*.bmp). After creating the GUI, check the Paint event as shown. You may inspect the CG::DIBitmap class to learn how to load, save and display a bitmap. Crea un proyecto llamado PhotoTool para mostrar un mapa de bits (Bitmap). La figura de abajo muestra la estructura de un archivo bitmap (*bmp). Después de crear la GUI, marca el evento de Paint como se muestra. Tu puedes inspeccionar la clase CG::DIBitmap para aprender como cargar, guardar y mostrar un bitmap. |
| PhotoTool.h |
| #pragma once //______________________________________ PhotoTool.h #include "Resource.h" class PhotoTool: public Win::Dialog { public: PhotoTool() { } ~PhotoTool() { } CG::DIBitmap bitmap; protected: . . . }; |
| PhotoTool.cpp |
| . . . void PhotoTool::Window_Open(Win::Event& e) { } void PhotoTool::btOpen_Click(Win::Event& e) { Win::FileDlg dlg; dlg.Clear(); dlg.SetFilter(L"Bimap image files (*.bmp)\0*.bmp\0\0", 0, L"bmp"); if (dlg.BeginDialog(hWnd, L"Open", false) == TRUE) { const wchar_t* error = bitmap.Load(dlg.GetFileNameFullPath()); if (error) this->MessageBox(error, L"PhotoTool", MB_OK | MB_ICONERROR); } this->Repaint(NULL, true); } void PhotoTool::btSave_Click(Win::Event& e) { Win::FileDlg dlg; dlg.Clear(); dlg.SetFilter(L"Bimap image files (*.bmp)\0*.bmp\0\0", 0, L"bmp"); if (dlg.BeginDialog(hWnd, L"Save", true) == TRUE) { const wchar_t* error = bitmap.Save(100, dlg.GetFileNameFullPath()); if (error) this->MessageBox(error, L"PhotoTool", MB_OK | MB_ICONERROR); } this->Repaint(NULL, true); } void PhotoTool::btCopy_Click(Win::Event& e) { if (bitmap.CopyToClipboard(hWnd) == false) { this->MessageBox(L"Unable to copy bitmap", L"PhotoTool", MB_OK | MB_ICONERROR); } this->Repaint(NULL, true); } void PhotoTool::btPaste_Click(Win::Event& e) { if (bitmap.PasteFromClipboard(hWnd) == false) { this->MessageBox(L"Unable to paste bitmap", L"PhotoTool", MB_OK | MB_ICONERROR); } this->Repaint(NULL, true); } void PhotoTool::Window_Paint(Win::Event& e) { CG::Gdi gdi(hWnd, true, false); gdi.DrawBitmap(bitmap, 0, 0); } |