Win32 |
| Win32 is a core set of functions that provide Windows functionability. In this section, we will explain how to create a simple calculator using only Win32 (without using Wintempla). In the examples, we will append 32 at end of the project name to indicate that the project was implemented using Win32 only. For instance, if the Wintempla project is called Program, the Win32 project will be called Program32. Win32 es un núcleo de funciones que permiten que Windows opere. En esta sección, se explicará cómo crear una calculadora simple usando solamente Win32 (sin usar Wintempla). En los ejemplos, se agregará un 32 al final del nombre del proyecto para indicar que el proyecto fue implementado usando solamente Win32. Por ejemplo, si el proyecto de Wintempla se llama Program, el proyecto de Win32 se llamará Program32. |
| Problem 1 |
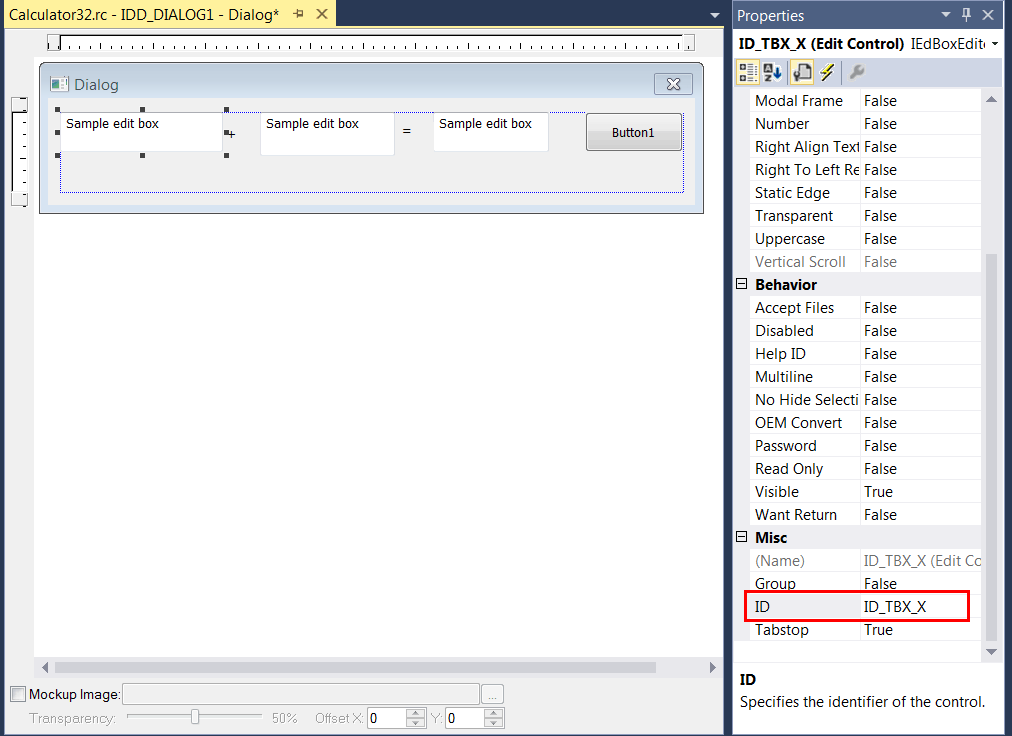
| Design a calculator to add two numbers as shown in the figure. Diseñe una calculadora para sumar dos números cómo se muestra en la figura. |

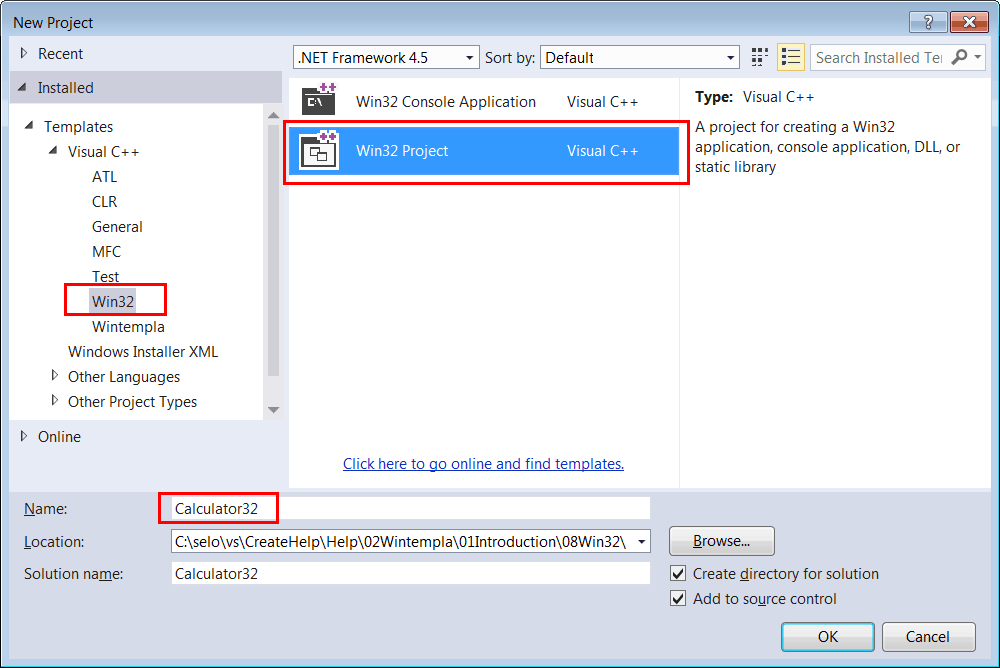
| Step 1. Create the proyect. |
|
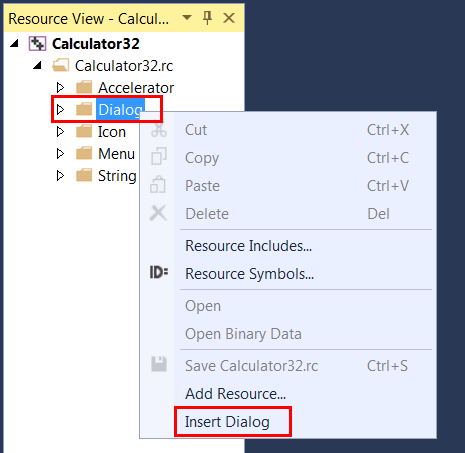
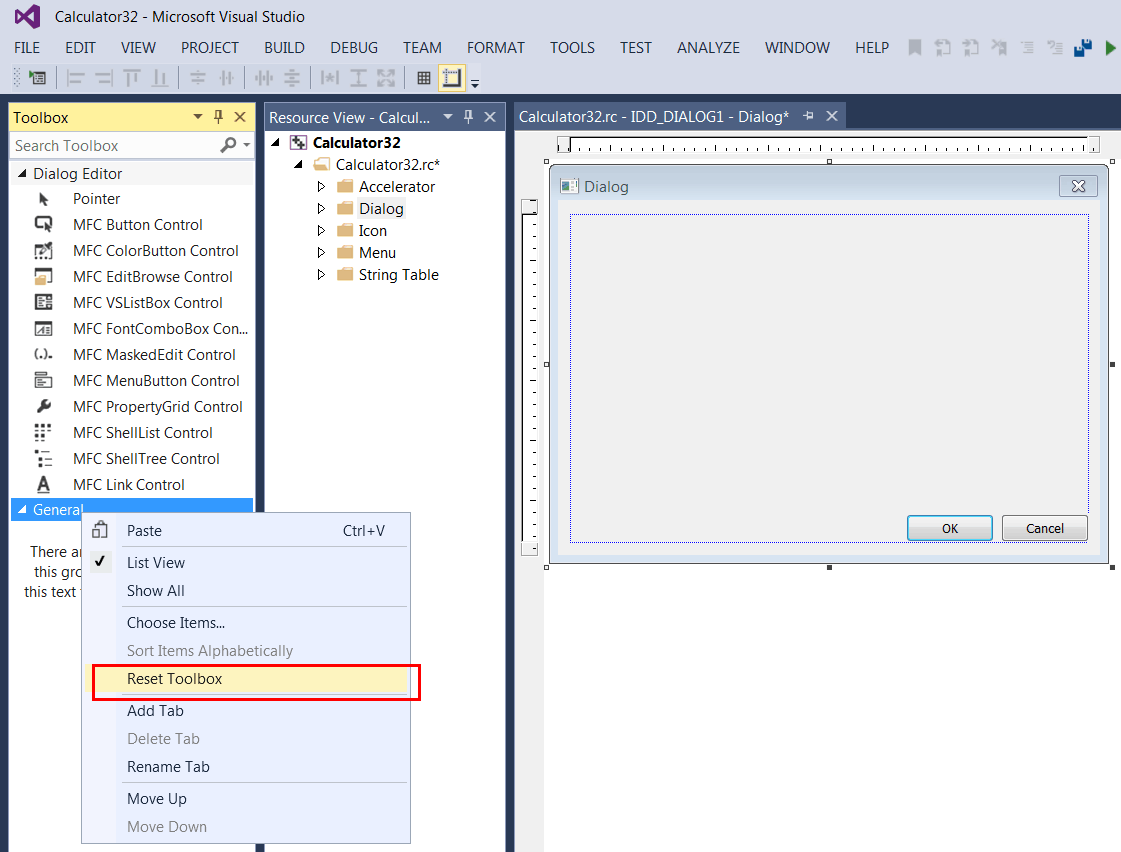
| Step 2. Edit the Graphic User Interface (GUI) using Resource View |
|
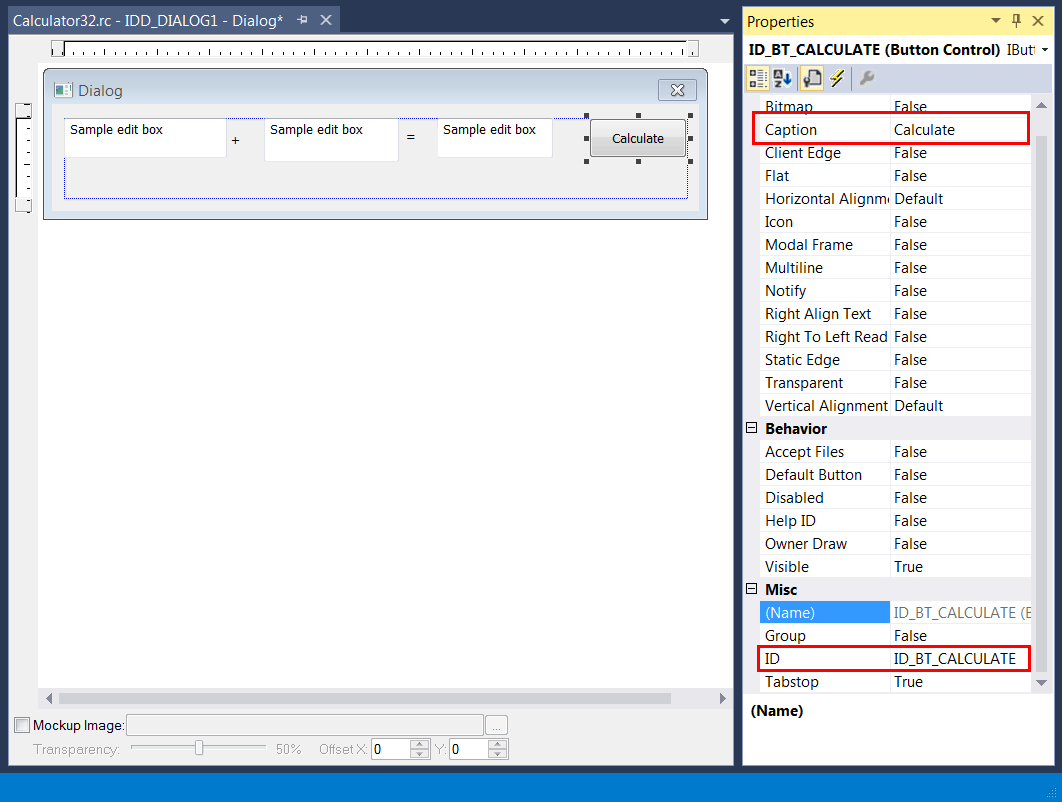
| Step 3. Write the code. |
Escriba el código.
|
| Calculator32.cpp |
| //_________________________________________________ Calculator32.cpp #include "stdafx.h" #include "Calculator32.h" INT_PTR Window_Open(HWND hWnd, WPARAM wParam, LPARAM lParam) { ::SetWindowText(hWnd, L"Calculator32"); return TRUE; } INT_PTR btCalculate_Click(HWND hWnd, WPARAM wParam, LPARAM lParam) { wchar_t text[32]; //_______________________________ Extract X ::GetWindowText(::GetDlgItem(hWnd, ID_TBX_X), text, 32); const double x = _wtof(text); //_______________________________ Extract Y ::GetWindowText(::GetDlgItem(hWnd, ID_TBX_Y), text, 32); const double y = _wtof(text); // const double z = x + y; //_______________________________ Display the result _snwprintf_s(text, 32, _TRUNCATE, L"%f", z); ::SetWindowText(::GetDlgItem(hWnd, ID_TBX_RESULT), text); return TRUE; } INT_PTR CALLBACK WndProc(HWND hWnd, UINT message, WPARAM wParam, LPARAM lParam) { switch (message) { case WM_INITDIALOG: return Window_Open(hWnd, wParam, lParam); case WM_COMMAND: if (LOWORD(wParam) == ID_BT_CALCULATE) return btCalculate_Click(hWnd, wParam, lParam); if (LOWORD(wParam) == IDCANCEL) ::EndDialog(hWnd, 0); break; } return (INT_PTR)FALSE; } int APIENTRY _tWinMain(HINSTANCE hInstance, HINSTANCE , LPTSTR cmdLine, int cmdShow) { ::DialogBox(hInstance, MAKEINTRESOURCE(IDD_DIALOG1), NULL, WndProc); return 0; } |
| Step 4. Run the program. |
| On the menu: Debug > Start Debugging Corra el programa. En el menú: Debug > Start Debugging |

HWND |
| An HWND is a variable representing a window handle. Microsoft Windows assigns an HWND to each GUI element (a window) in the screen. This handle allows identifying and manipulating each window by the operating system and the programs. Un HWND es una variable para manipular una ventana. Microsoft Windows asigna un HWND a cada elemento GUI (una ventana) en la pantalla. Esta variable permite identificar y manipular cada ventana por el sistema operativo y los programas. |
| Problem 2 |
| (a) Compare the code of Wintempla > Introduction > Simple Calculator with the code of Wintempla > Introduction > Win32, (b) Discuss similarities, (c) Discuss differences, (e) When do you use each of these codes. (a) Compare el código de Wintempla > Introduction > Simple Calculator con el código de Wintempla > Introduction > Win32, (b) Discuta similitudes, (c) Discuta diferencias, (e) Cuando usar cada uno de estos códigos. |